
The purpose of a bra underwire is not to poke or scratch but to lift and support your busts. Women who wear underwired bras must have crossed this situation.
An exposed underwire is caused by many factors which include improper bra care. Aggressive washing with concentrated detergents weakens the fabric. Another factor could be that the bra doesn’t fit you the way it should, exacerbating those unfortunate underwire issues!
Fear not, you don’t have to replace your expensive bras with new ones; you can actually fix bra underwire with some simple DIY bra underwire hacks.
With these easy and quick fix bra underwire tricks, you don’t have to tolerate any wire stabbings anymore.
1. Sew a fabric patch
The simplest and well-ordered way of fixing the underwire is to sew them. This trick does not show any evidence of stitches outside the bra and lasts longer than any other trick. But one must have some basic sewing skills in order to achieve a neat look.
Materials needed: patch fabric, sewing needle, scissors, and sewing thread
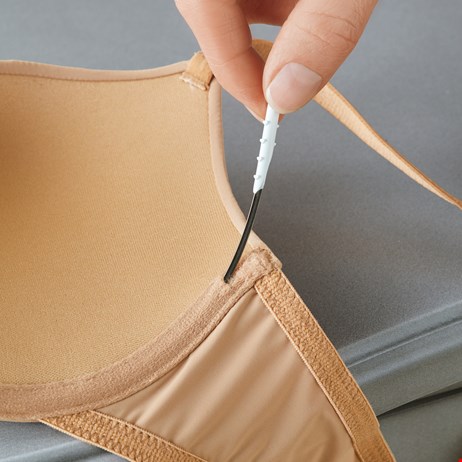
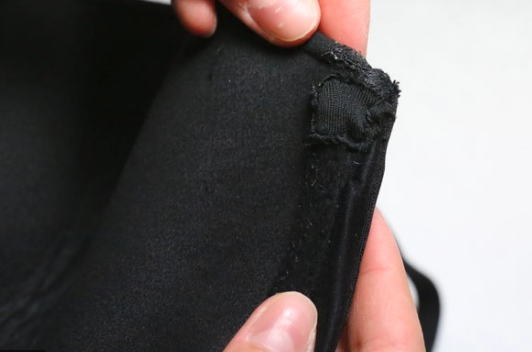
Step 1: Firstly, locate where the underwire breaks through the fabric.
Step 2: Push the wire back into the fabric and cut a piece of matching fabric. (Make sure the fabric is thick enough so that the wire does not poke through again)
Step 3: Place the fabric over the hole and sew with an overlock stitch.
(You can also use super glue or fabric glue instead of sewing, but the results may vary)
2. Moleskin Patch
This is yet another quick and best way to fix bra underwire. All you need is a moleskin stripe. Moleskin stripes (also known as mole foam padding) are basically self-adhesive cotton padding stripes that are used to relieve pain from blisters. They have a strong adhesive that can stick to the fabric and are soft on skin as well.
Materials needed: Moleskin, Scissors
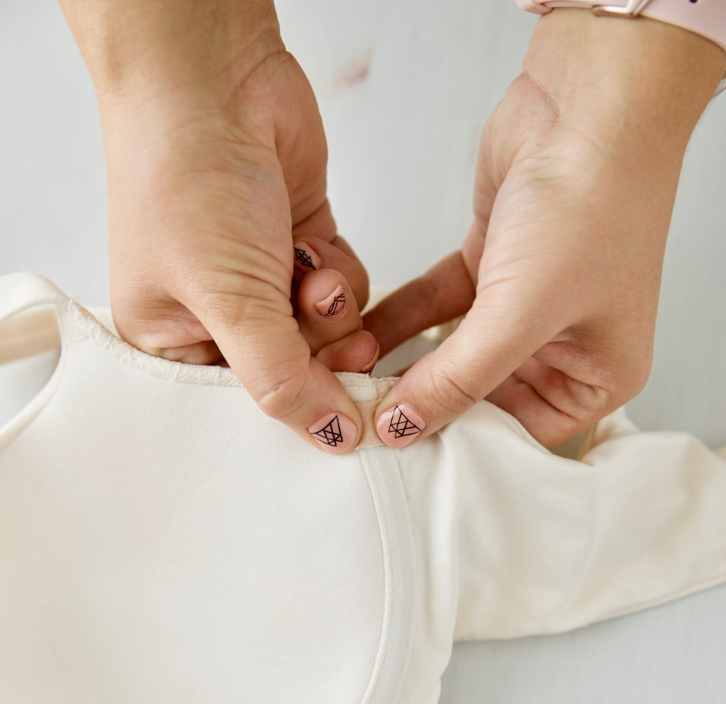
Step 1: Reposition the underwire back into the fabric
Step 2: Determine the size of your patch according to the hole that the underwire left behind.
Step 3: Cut the required size of moleskin with scissors.
Step 4: Now, remove the adhesive backing and apply it to the hole. Press them firmly so that it sticks well to the fabric and make sure it stays put.
This hack does not last as long as the previous one, as the adhesive might lose its strength over time.
3. Reshape the underwire
If it’s the under wire’s support that’s bothering you then you need to reshape your underwire. You can customize your underwire by yourself for a better fit.
Bend the bra’s underwire until it fits right into the crease of your busts and not on top or away from the busts crease. If the breast tissue is not fully contained in your cup, then you need to go up a cup size.
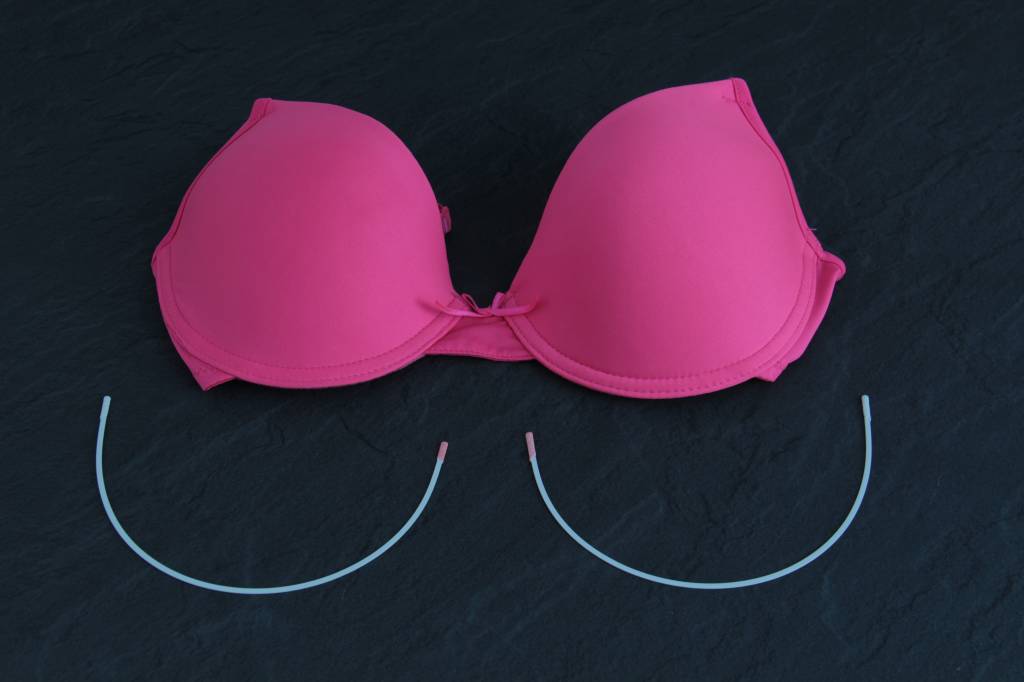
4. Remove the underwire
If you are not comfortable with the underwire itself or that you are too concerned about the harms caused by the bra then you probably no longer need it. You can remove the wire easily by following these steps,
Materials needed: sewing needle, scissors, and sewing thread
Step 1: Poke a hole using scissors at one of the ends of the wire, either at the center of the bra or at the underarm.
Step 2: Wiggle the wire so that the wire emerges from the hole and gently pull out the wire from the fabric channel and remove it completely.
Step 3: Repeat the same process for the other cup and sew the openings with a basic stitch.